From Seed to Storage
Learn the essential techniques of canning, drying, and seed saving to turn your seasonal harvest into year-round food security.


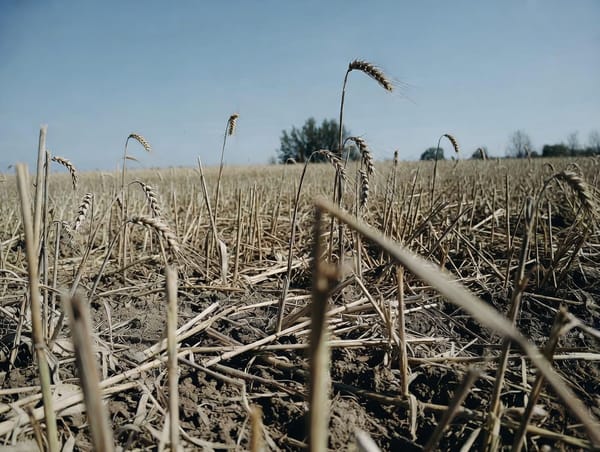
Your tomatoes are ripening faster than you can eat them. The beans are coming in waves. And those heirloom peppers you've been nurturing since March? They're finally producing — all at once. If you've ever grown your own food, you know this moment well: the harvest arrives in a flood, not a trickle.
The good news is that humans have been solving this exact problem for thousands of years. Canning, drying, and seed saving form a triad of preservation skills that turn a seasonal glut into year-round food security. These aren't quaint hobbies — they're practical systems that reduce your grocery dependence, cut food waste, and give you genuine control over what your family eats.
This guide walks through the core principles and practical details of each method so you can start preserving with confidence.
Why Preservation Matters More Than Ever
The average household wastes roughly 30–40% of its food supply, according to the USDA. Much of that waste happens because fresh produce has a narrow window before it spoils. Preservation extends that window from days to months — or even years.
Beyond waste reduction, a well-stocked preservation pantry acts as a buffer against supply chain disruptions, price spikes, and seasonal gaps. When winter hits and fresh tomatoes cost three times their summer price, a shelf of home-canned sauce pays for itself many times over.
Preservation also puts you back in the driver's seat regarding ingredients. Commercial preserved foods often contain added sugars, excess sodium, and preservatives you wouldn't choose. When you do it yourself, you control exactly what goes into every jar.
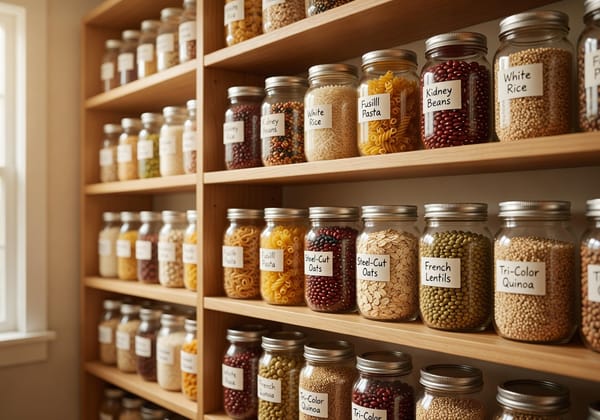
Canning: The Foundation of Long-Term Storage
Canning works by sealing food in airtight containers and heating them to temperatures that destroy spoilage organisms. Once sealed, the vacuum inside the jar prevents recontamination. Done correctly, canned food remains safe and nutritious for one to five years.
Understanding the Two Methods
The critical distinction in canning is between water bath canning and pressure canning, and it comes down to acidity.
Water bath canning works for high-acid foods — fruits, pickles, jams, salsas, and anything with a pH of 4.6 or below. The boiling water (212°F / 100°C) is sufficient to kill harmful organisms in acidic environments. This is the easier entry point for beginners.
Pressure canning is required for low-acid foods — vegetables, meats, poultry, soups, and beans. These foods need to reach 240°F (116°C) to destroy Clostridium botulinum spores, which cause botulism. Only a pressure canner can reach these temperatures. This is non-negotiable from a safety perspective.
Safety Is Not Optional
The USDA Complete Guide to Home Canning remains the gold standard for tested recipes and processing times. The single most important rule: always use tested recipes from reliable sources. Adjusting ingredients, proportions, or processing times can create conditions where dangerous bacteria survive.
A few non-negotiable practices:
- Check your altitude. Boiling temperatures drop at higher elevations. If you live above 1,000 feet, you must increase processing times or pressure settings according to USDA guidelines.
- Inspect every seal. After jars cool, press the centre of each lid. If it flexes up and down, the seal failed — refrigerate and use that jar first.
- Use proper equipment. A pressure canner is not the same as a pressure cooker. Invest in a dedicated canner with a reliable gauge, and have it tested annually.
Getting Started
If you're new to canning, begin with water bath projects: pickled cucumbers, tomato sauce, or fruit preserves. These are forgiving, require minimal equipment (a large pot, jar lifter, and Mason jars), and produce results you'll actually use. Once you're comfortable with the process, move to pressure canning for vegetables and stocks.
Drying: Lightweight, Space-Efficient Preservation
Dehydration is arguably the oldest preservation method on earth. By removing moisture, you eliminate the environment bacteria, yeasts, and moulds need to grow. The result is lightweight, shelf-stable food that retains most of its nutritional value and concentrates its flavour.
Temperature Matters
The National Center for Home Food Preservation recommends drying most foods at 140°F (60°C) as a baseline, but optimal temperatures vary by food type:
- Herbs: 95°F (35°C) — low heat preserves volatile oils and flavour
- Vegetables: 125°F (52°C) — slightly higher to drive out moisture without cooking
- Fruits: 135°F (57°C) — balances moisture removal with texture retention
- Jerky and meats: 160–165°F (71–74°C) — must reach safe internal temperatures first
One common mistake is cranking the heat to speed things up. This causes case hardening — the outside dries and forms a shell while moisture remains trapped inside, creating a perfect environment for mould. Patience and consistent temperature are your allies.
Methods and Equipment
You don't need expensive gear to start dehydrating:
- Electric dehydrator: The most reliable option. Models with adjustable thermostats and horizontal airflow give the most consistent results. Expect to spend $50–150 for a solid home unit.
- Oven drying: Set your oven to its lowest temperature (usually 170°F) and prop the door open slightly to let moisture escape. It works, but uses significantly more energy.
- Sun drying: Effective in hot, dry climates (consistent temperatures above 85°F with low humidity). Requires screens to protect from insects and good air circulation.
Storage and Shelf Life
Once food is fully dried, condition it by placing it in sealed glass jars for a week, shaking daily. If condensation appears inside the jar, the food needs more drying time. Properly dried food stored in airtight containers in a cool, dark place lasts six months to a year — longer if vacuum-sealed or kept in the freezer.
Seed Saving: Closing the Loop
Preserving food handles this year's harvest. Seed saving secures next year's. By collecting and storing seeds from your best-performing plants, you build a self-renewing food system that adapts to your specific growing conditions over time.
Start With Open-Pollinated Varieties
This is the single most important rule for seed savers: save seeds from open-pollinated (OP) varieties, not hybrids. Open-pollinated plants produce offspring true to the parent — the tomatoes you grow from saved seeds will match the ones you harvested from. Hybrid (F1) seeds, by contrast, produce unpredictable results in the next generation.
Seed packets and catalogues will tell you whether a variety is OP or hybrid. Heirloom varieties are always open-pollinated.
The Easiest Plants to Start With
Self-pollinating plants are the most beginner-friendly because they rarely cross-pollinate with neighbouring plants:
- Tomatoes — let fruits fully ripen, scoop out seeds, ferment in water for 2–3 days, rinse, and dry
- Peppers — allow pods to fully mature (they'll change colour), scrape out seeds, and dry flat
- Beans and peas — leave pods on the plant until they're dry and rattling, then shell and store
- Lettuce — let one plant bolt and flower; collect the tiny seeds once the flower heads dry out
Cross-pollinating plants like squash, corn, and brassicas require isolation distances (sometimes half a mile or more) to keep varieties pure. Save these for when you have more experience — or more acreage.
Proper Storage
Seeds are alive, and their enemies are moisture, heat, and time. After thoroughly drying your seeds (at least a week on paper in a well-ventilated room), store them in paper envelopes inside an airtight container. Adding a small silica gel packet absorbs residual moisture.
Keep your seed bank in a cool, dark place — a refrigerator works well. Most vegetable seeds remain viable for three to five years under good storage conditions, though some (like onions and parsnips) lose viability faster.
Building Your Preservation System
These three methods work best together. Canning handles your high-moisture, high-volume harvests (tomatoes, fruits, stocks). Drying takes care of herbs, peppers, and anything you want in compact, lightweight form. Seed saving ensures the whole cycle repeats without dependence on commercial seed suppliers.
A practical approach for your first year:
- Start small. Pick one or two preservation methods and a handful of recipes. Master the basics before expanding.
- Align with your harvest. Preserve at peak ripeness for the best flavour and nutrition. Don't wait until produce is past its prime.
- Label everything. Date, contents, and method on every jar, bag, and envelope. You'll thank yourself in January.
- Rotate your stock. Use the oldest preserved items first. This isn't just organisation — it's food safety.
- Keep records. Note what worked, what didn't, and what you'd do differently. Preservation is a skill that improves with each season.
Food preservation connects you to a lineage of practical knowledge stretching back millennia. It's not about preparing for the worst — it's about making the most of what you grow, reducing what you waste, and building a food system you actually control. Start with one method, one harvest, and one season. The skills compound from there.