Energy Independence
A practical, budget-friendly guide to generating your own power — from portable solar chargers to battery banks and DIY projects that build real energy resilience.


Every year, the average American household spends more on electricity than the year before. In 2026, residential rates hit roughly 18 cents per kilowatt-hour nationally — and in states like Massachusetts or Rhode Island, they top 31 cents. Meanwhile, grid outages are becoming more frequent as extreme weather intensifies and aging infrastructure struggles to keep up. The case for generating at least some of your own power has never been stronger.
Energy independence doesn't mean disconnecting from civilization or spending a fortune on rooftop panels. It means building layers of resilience — starting small, learning as you go, and gradually reducing your dependence on a system you can't control. This guide walks you through the practical, budget-friendly tools and strategies that make that possible.
Why Generating Your Own Power Makes Sense
The financial argument is straightforward. U.S. residential electricity prices have risen roughly 5% year-over-year, driven by natural gas costs, grid modernisation expenses, surging demand from data centres and electric vehicles, and the capital costs of the energy transition itself. That trend isn't reversing any time soon.
But cost isn't the only motivator. A portable solar setup means you can keep phones charged and lights on during a multi-day blackout. A battery bank means your refrigerator keeps running when the grid doesn't. And every kilowatt-hour you generate from sunlight or wind is one that doesn't come from burning fossil fuels — a tangible way to shrink your household carbon footprint without waiting for policy changes.
The key insight is that energy independence is a spectrum, not a switch. You don't need to go fully off-grid to benefit. Even a modest solar charger and a small battery give you options you didn't have before.
Start With Portable Solar
Portable solar chargers are the lowest-cost, lowest-risk entry point into self-generated power. A decent foldable panel from brands like BigBlue, BioLite, or Goal Zero costs between $30 and $150 and can charge phones, tablets, headlamps, and small battery packs directly from sunlight.
For most people, a 10–20 watt panel is the sweet spot. It's light enough to toss in a daypack, powerful enough to top up a phone in a few hours of direct sun, and durable enough to survive rain and trail dust. Look for models with integrated USB ports and a built-in battery buffer so the panel can store energy even when your device isn't connected.
If you want to move beyond gadget charging, a 100-watt folding panel paired with a portable power station opens up a much wider range of possibilities. Companies like Jackery, EcoFlow, and Anker now sell all-in-one solar generator kits — panel plus lithium battery station — starting around $300–$400 for entry-level setups. These can run laptops, CPAP machines, portable fridges, LED lighting, and small appliances, making them genuinely useful for both camping and home emergency backup.
The advantage of starting portable is flexibility. You learn how solar behaves in your climate — how panel angle, shade, cloud cover, and season affect output — without committing to a permanent installation.
Consider Wind — But Be Realistic
Small wind turbines sound appealing as a complement to solar, especially in cloudy climates. In theory, wind fills the gaps when the sun doesn't shine. In practice, residential wind power has significant limitations that are worth understanding before you invest.
The economics are challenging. Installed costs for small wind systems run approximately $8,000 per kilowatt of capacity — significantly more expensive per watt than solar panels. A 5 kW residential turbine can easily cost $30,000–$50,000 fully installed, and it requires consistent wind speeds above 10 mph to produce meaningful output. Most suburban and urban properties simply don't have the wind resource, the vertical clearance, or the zoning permissions to make a turbine viable.
Where wind does work well is on rural properties with open exposure, consistent breeze patterns, and enough land to mount a turbine on a proper tower well above nearby obstructions. In those settings, a well-sited turbine can generate 50–80% of a home's electricity needs and pay for itself within a decade.
For most beginners, the honest recommendation is to focus your budget on solar and battery storage first. If you live in a genuinely windy rural area and have the space, investigate wind as a second-phase addition once you've built experience with your solar system.
Build a Battery Bank
Generating power is only half the equation. Storing it for use after dark or during cloudy stretches is what turns a solar panel from a daytime convenience into a reliable energy source.
The battery market has shifted dramatically in the past few years. Lithium iron phosphate (LiFePO4) chemistry has become the standard for home energy storage, and for good reason. LiFePO4 batteries offer 4,000–8,000 charge cycles (compared to 500–1,000 for old-style lead-acid), they're safer and more temperature-tolerant, and their prices have dropped sharply — pack-level costs for stationary storage fell to around $70 per kilowatt-hour in 2025, roughly 45% lower than the previous year.
For a beginner setup, a 12-volt LiFePO4 battery in the 100–200 amp-hour range provides a solid foundation. Paired with a solar charge controller (which regulates the flow of power from your panels to prevent overcharging) and an inverter (which converts stored DC power to standard AC for household devices), this kind of system can run lights, charge electronics, and power small appliances for hours.
A few practical considerations for your battery bank: store batteries in a ventilated, temperature-stable area away from direct sunlight and extreme cold. Use a battery monitor to track state of charge so you don't over-discharge, which shortens lifespan even with lithium chemistry. And size your system to your actual needs — a simple energy audit with a plug-in power meter (about $15–$25) will show you exactly how many watt-hours your essential devices consume per day.
Cut Consumption Before You Generate
The cheapest watt is the one you never use. Before investing heavily in generation and storage, take an honest look at how much energy your household wastes — because the answer is almost certainly "more than you think."
LED lighting is the easiest win. If you still have incandescent or CFL bulbs in your home, switching to LEDs can cut your lighting energy use by up to 75%, saving a typical household around $225 per year. LEDs cost as little as $2–$5 per bulb in multi-packs and last for years.
Smart power strips address another hidden drain: standby power. Televisions, game consoles, phone chargers, and other electronics draw power even when "off." A smart power strip automatically cuts power to devices that aren't in active use, eliminating this phantom load without requiring you to constantly unplug things. At $25–$40 per strip, they pay for themselves within months.
Insulation and weatherisation are higher-effort but higher-reward investments. Sealing air leaks around windows, doors, and attic hatches, and adding insulation where it's thin, can reduce heating and cooling costs by $150–$500 per year depending on your climate and home's current condition. The U.S. Department of Energy's Energy Saver guide offers free, detailed walkthroughs for every common efficiency upgrade.
The cumulative effect of these changes is powerful. A household that switches to LEDs, eliminates standby draw, and improves insulation can realistically cut total energy consumption by 20–30% — which means any generation system you build needs to be that much smaller and cheaper to meet your needs.
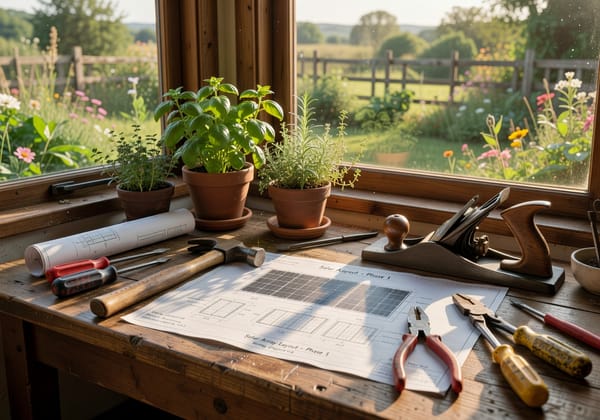
DIY Projects Worth Your Time
Part of the appeal of energy independence is the hands-on learning. A few beginner-friendly projects can teach you useful skills while producing real value.
Solar thermal heating is one of the most cost-effective DIY energy projects you can build. A simple solar air heater — essentially a black-painted absorber panel in an insulated box with a fan — can meaningfully warm a room on sunny winter days for under $50 in materials. Plans are widely available on YouTube and at Instructables.com. The key is proper sizing (match the heater to the room) and ensuring adequate ventilation so you're moving warm air without creating moisture problems.
A portable solar charging station is another practical project. Mount a 50–100 watt solar panel on a simple frame, wire it through a charge controller to a LiFePO4 battery, add a small inverter and a few USB outlets, and you have a self-contained power station that can charge devices, run a fan, or power work lights in a shed or garage. Total cost: $150–$300 depending on components, and the skills you learn transfer directly to larger systems.
Energy monitoring is a less glamorous but arguably more valuable project. Install a whole-home energy monitor (devices like the Emporia Vue cost around $30–$50) and spend a month tracking where your electricity actually goes. Most people discover one or two surprise energy hogs — an old chest freezer, a dehumidifier running 24/7, a gaming PC in sleep mode — that account for a disproportionate share of their bill. Fixing those single issues often saves more than a solar panel would generate.
Planning Your Path Forward
Energy independence works best as a deliberate, staged process rather than a single large purchase. Here's a practical progression that keeps costs manageable and learning continuous.
Month one: Buy a portable solar charger ($30–$80) and use it daily. Get familiar with how much sun your location actually receives, how panel angle affects charging speed, and how quickly your devices draw down a charge. Pick up a plug-in energy meter and start auditing your household consumption.
Months two through three: Address the low-hanging efficiency fruit. Switch remaining bulbs to LED, install smart power strips on your entertainment centre and home office, and seal any obvious air leaks. Track your electricity bill to quantify savings.
Months four through six: Invest in a portable power station with a folding solar panel — or build a DIY charging station. Begin using it regularly for outdoor activities or as a backup power source. Learn how to size battery capacity to your actual needs.
Month six and beyond: Based on what you've learned, decide whether to scale further. A rooftop or ground-mounted solar array, a larger battery bank, or even a grid-tied system with net metering might be the logical next step. At this point, you'll have the practical knowledge to evaluate quotes, understand specifications, and avoid overpaying.
Community and Resources
You don't have to figure all of this out alone. Online communities like Reddit's r/SolarDIY and r/OffGrid are filled with people at every stage of the journey, from first-time solar charger buyers to experienced off-gridders. Local maker spaces and community colleges sometimes offer workshops on basic electrical skills and renewable energy systems.
For product research, The Prepared offers thorough, test-based reviews of solar chargers and emergency power gear. The Department of Energy's Small Wind Guidebook is the definitive free resource if you're seriously considering wind. And EnergySage provides marketplace comparisons and educational content for residential solar and storage.
The Bigger Picture
Energy independence is ultimately about agency. It's about knowing that when the grid falters, your household has options. It's about understanding where your power comes from and making deliberate choices about that. And it's about building practical skills that compound over time — each project teaches you something that makes the next one easier and more effective.
You don't need to start big. A $30 solar charger and a Sunday afternoon spent auditing your energy use will teach you more about your relationship with electricity than most people learn in a lifetime. Start there, and let curiosity carry you forward.